Some final tips on imported text
If you’ve followed steps one and two on preparing your Word file for import, your imported text should mostly have the attributes of the styles you’ve set up in your Quark file. Here are a few more hints for tidying up your copy once it’s inside QuarkXPress.
The following tips are based on documents produced on a template such as the one I posted earlier, but I expect these tips will be universal for any imported document.
Table of contents
Firstly, the automatic table of contents will probably have got mangled somewhat. I haven’t found a workaround for this yet, but it can be formatted using your Quark styles fairly easily. You’ll have to do the numbers yourself though, or get one of your elves to do it.
Bullets and numbers
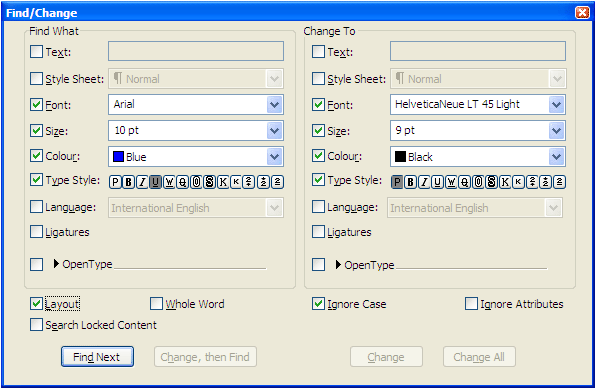
The macro I posted should mean your bullets and numbers should have imported okay, but you might want something different to the standard MS Word bullets. This can be fixed quite easily using Find/Change in Quark. You’ll have to uncheck the ‘Ignore Attributes’ box.

In this example, I’ve copied the bullet, along with the tab next to it and pasted it into the find box (\t is the Quark shortcut for a tab). It appears as a garbled character, but if you press the find button, it should find a nearby bullet and tab. The bullet point is black and in a Symbol font, so I’ve selected those formatting options. The settings I’ve shown above will change a standard Word bullet into a square bullet (an ‘n’ in the Wingdings font) of a spot colour I’ve already added to the colours window. Press “find next” and the next bullet and tab should be selected. Press “change all” and all your black round bullets should become red squares.
It’s really worth experimenting with Find/Change in Quark (and with Find and Replace in Word), as this can save a lot of time. You could use a similar method to make the second levels of bullets red, by replacing a black en dash followed by a tab with a red one.
Getting rid of stray fonts
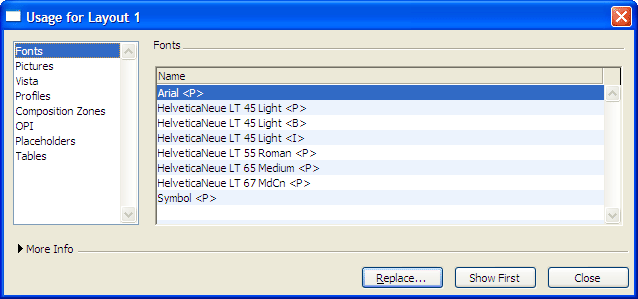
As I noted on my fonts posting, it’s important to replace faux bold characters with proper bold fonts. The trick is to use the Utilities>Usage box in Quark. Here’s a typical usage box with fonts selected. It’s based on text imported from the standard Word template I’ve posted on this site.
This project is built around the Helvetica Neue typeface and uses several fonts. The body copy is based on the 45 light font, which displays as HelveticaNeue LT 45 <P>. However, HelveticaNeue LT 45 <P><B> needs to be replaced with HelveticaNeue LT 55 Roman <P>, which I’m using as the bold font. This is easy to do – simply press the replace button and select a new font. In addition, some Arial has crept in from the original Word copy, which will need replacing as well. They Symbol font is being used for bullet points, so will stay as it is.
Getting rid of stray colours
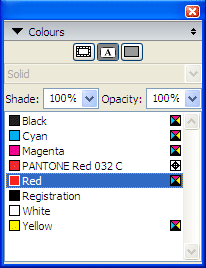
In a similar way, you can get rid of any stray colours – especially RGB colours. Pressing F12 brings up the colours box. In this example, the project is a two-colour job (black and Pantone Red 032C). Cyan, Magenta and Yellow are not being used in this project, but cannot be deleted. However, something in the project is using an RGB colour from MS Word, which is showing up as ‘Red’. Right-clicking on ‘Red’ allows you to delete the colour and replace it with another (if the red in the body text, you’ll want to replace it with Black).
Getting rid of hyperlink formatting
Word tends to make automatic hyperlinks in a blue, underlined format and these are retained on import. Again, this can be got rid of using Find/Change by selecting the attributes of the offending text.
Leave a Reply