Simple table formatting
Quark 7 (and 6.0 and 6.5 before it) allows you to format tables in as many ways as any other type of Quark box. However, if you’re not a designer, here are some tips on doing a nice simple table in the shortest possible time.
Here’s the dialog box that appears when you draw a table using the table button on the toolbox.
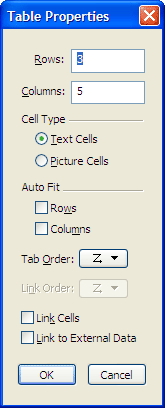
Filling in the rows and columns fields is self-explanatory. Selecting ‘text cells’ is probably the option you need for a standard table (the other option allows you to import an image behind, but that’s too ambitious for me).
The remaining options are essentially around importing text into your tables. For a small table, it’s probably best to enter the data yourself; for a longer one, it’s better to get the author to provide an Excel file and import that. (For an overview of importing from Excel read this post.)
Some formatting tips
Resizing rows and columns
You will have to do some manual resizing and this is done using the contents tool.
- Resizing columns vertically is a little bit idiosyncratic. Take some time to play around with this function to get used to how it works.
- The best way to set the height of rows is probably to select the row(s) and enter a number into the control box. As most rows in tables tend to be a single line in height, set this value, then resize the few rows where there is more text.

Formatting using the object tool
The following are all done using the object tool, selecting Item>Modify.
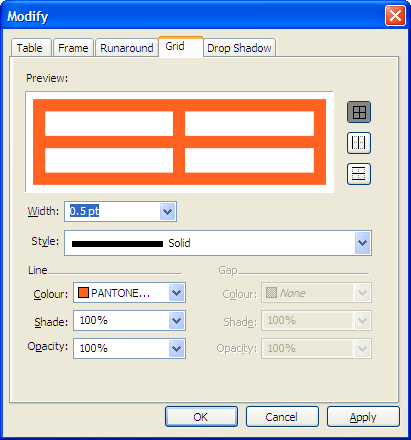
- If you’re using gridlines, you can format them all at once by selecting the Grid tab (as shown above). I usually set gridlines to 0.5pt, but that’s your choice
- Select the Frame tab and set the border to 0pt, as otherwise you get a thicker border compared to the rest of your gridlines.
Formatting using the content tool
Selecting all the cells in the table:
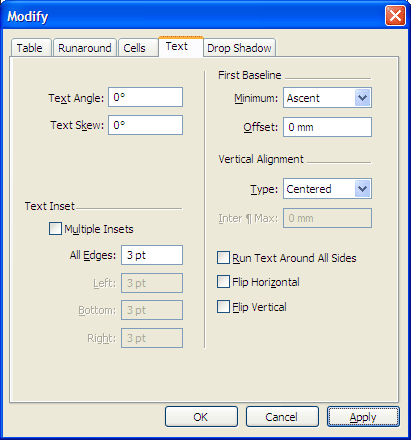
- Visually, I think it looks better to centre the text in tables vertically — do this by selecting ‘Centred’ on the Vertical Alignment option
- Set the text inset within the cells to an appropriate value.
Anything else?
- You can set Runaround whether you’ve selected the table with the content or object tools. This is the easiest way of offsetting the text around it
- There are obviously lots of other formatting options to play with and your use of these obviously depends on how much time you have (usually not enough) and how artistic you are (personally, not very).
Where to put tables
- Visually, you’ll really want to make the width of your table a multiple of however many columns you’re using — for example, on a two-column layout, your tables should be either one or two columns wide. Wrapping text in the middle of a column using Runaround, for example, usually doesn’t look that great
- Avoid breaking a column into two with a table. I tend to put them at the top or bottom of pages
- Tints are a good idea (for the header row for instance). I’ve found that 20% is a good minimum value. On screen, 10% often looks fine, but I’ve found it looks very faint when printed
- There’s nothing to stop you running a table across a spread if it’s very big, but do be careful, as you have to anticipate how it will look on the finished job.
- Apply runaround to the table and to the table caption, whether it’s above or below the table. Make sure your runaround settings are enough to offset all the body copy (sometimes stray lines can get lost amid tables and captions).
Some editorial considerations
- As I’ve mentioned in other postings, authors have a habit of putting tables directly below the relevant text in their MS Word files. They then refer to them as ‘the table below’ or ‘the table overleaf’ and so on. These instructions will probably be completely irrelevant once it’s typeset, so edit any copy to say ‘see Table 3’ or ‘As Table 3 shows…’ and do your best to get the table on the same page or the same spread.
Great screen shots, but you left out the most important part how to make headers…..